Reading-Rewards.comReading-Rewards is a great website that allows students to digitally log their nightly reading. No more paper logs to fill out and pass in every week! Teachers can even set up classroom rewards for students! The more they read, the more points they earn towards your rewards. Check out the video on the left for a quick demonstration of online reading logs in action. It's easy to get started. Follow the directions below as I break it down into 3 sections:
|
|
- First, you need to sign up as a teacher. Go to Reading-Rewards.com and click on "Teacher Sign-Up" (it's a bright green button on the left side of the page). Type in your personal information and click submit. They will send you an activation email that you need to respond to in order to finish creating your account. Once you have activated your account, click on the "Sign In" tab to get started!
- Next, you need to create your first group. Click on the blue "Create a New Group" button. Decide what you want to name your group/class (mine is Mrs. Dempsey's 2nd Grade @ FMS) Write a brief description of your group (optional). Choose a start and end date for your group (I used my school calendar for this). You want to secure your group with a code! This will protect your group from unwanted visitors. Now you have some choices to make. Do you want parents to validate their child's reading? (I love this feature! Parents receive email notification when their child has logged reading time. Parents then need to approve their reading time for it to count!). You also need to decide if you want students to have the option to write on the blog (It is a great tool for reading discussions!). You have the choice of wether or not to allow private messaging between students (I chose not to give students this option. I want to make sure the site is used only for education purposes.) Set a target reading goal for the whole class and individually (I set my students individual goal to 15 minutes a night). When you're happy with your choices, click on the blue "Next" button on the bottom of the form. Congratulations! You have now created your first reading group!
- Next, click on the blue "Add students to your group" button. Type in your students personal information and create their usernames and passwords. I suggest keeping it easy, for your student's username- try their first initial and last name. Make all their passwords the same, use the name of you school or the school's mascot. Should one of your students change their password and forget it, you can go back in and reset it! Don't forget to add parent email addresses if you want parents to validate their child's reading! When your done, click on the blue "Save this Student" button on the top of the form. After you submit the information, another blank form will appear so you can create an account for another student. Don't panic, the student's information you just entered was saved! Continue entering information for all of your students. When you're done, click on the "Groups" tab on the top of the page. There you should see the accounts you created for all of your students.
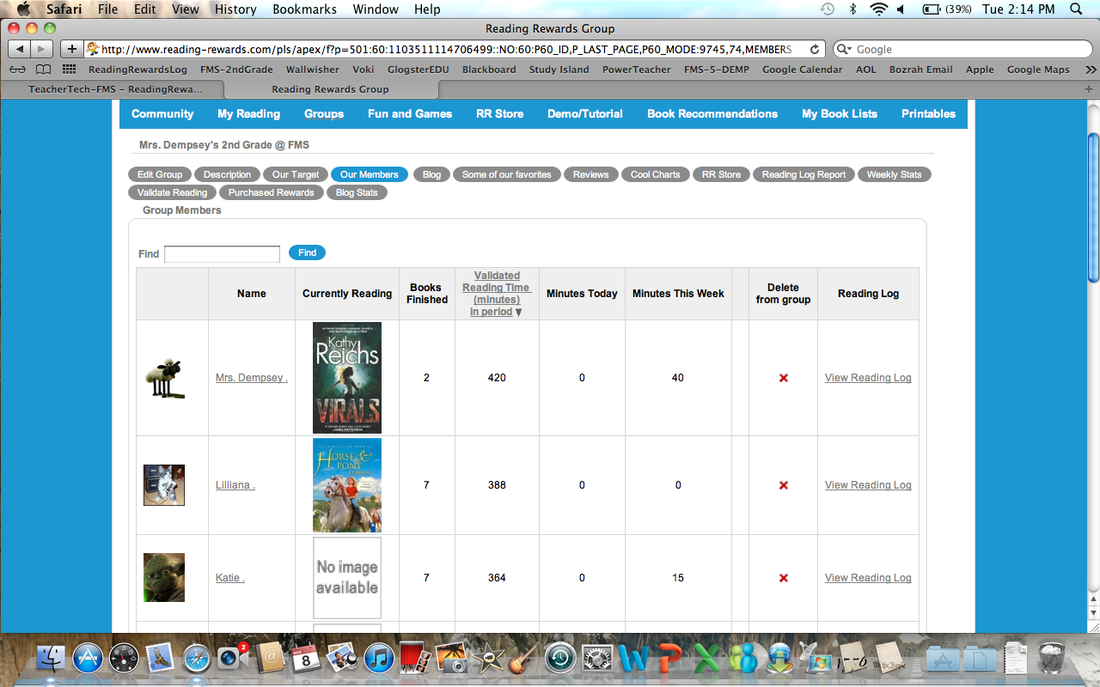
When students login they will see their "reading group" (the students in their class). Students will be able to check out what their peers are reading, their comments, and book reviews. The screenshot below is of the teacher's group page. You can see there are options only available to the teacher on the top of the screen (the gray tabs). Teachers also have the added option to delete students from the group.
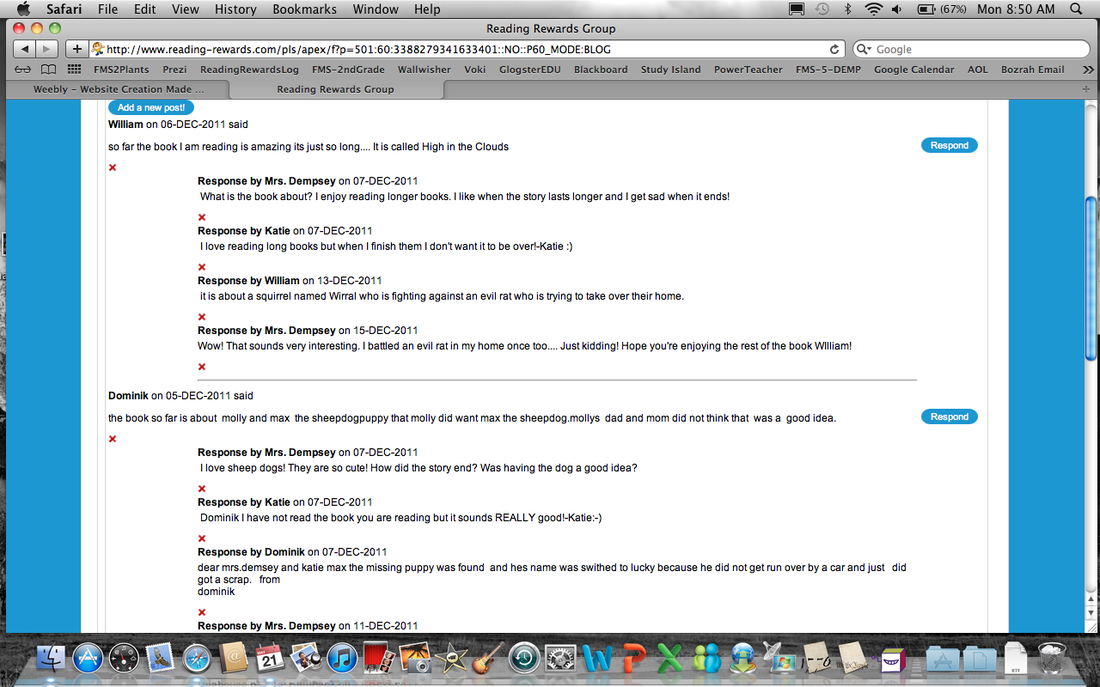
Blogging on Reading-Rewards.com
When you create an account for your classroom you get a secure blog where students can write about what they are reading. Below is a screenshot of my blog from my second grade class: